Background paper textures

Free background paper textures

While I was doing my Cargo Collective folio I decided to make a new repeating background gif. Originally I really wanted to have a really bright colourful background, break from the mold of ether black (ish) & white (ish). After much experimenting and playing around, I just couldn’t find a colour that didn’t clash with my work – problem with a colourful image heavy site, so I ended up plumbing for white (ish)

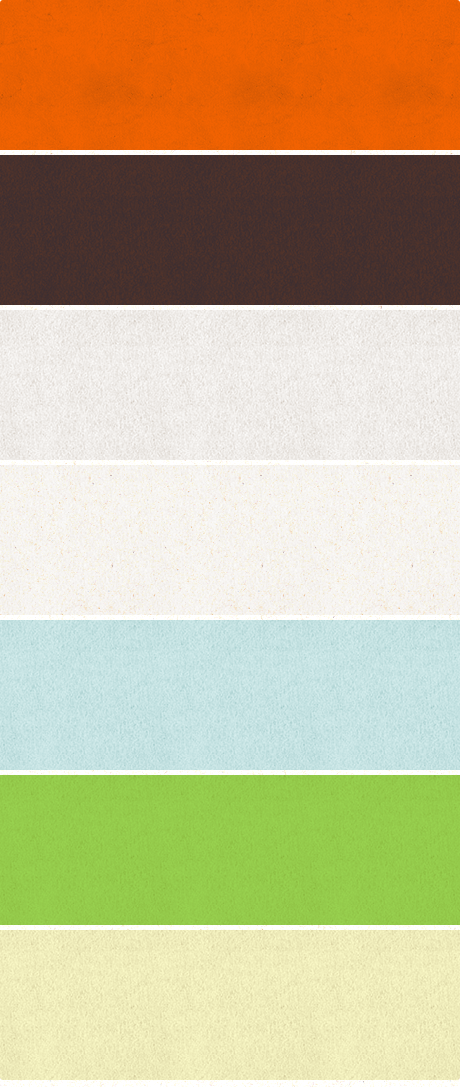
The good news though – I thought I’d post all the rejects here, maybe they’ll be of use to some of my readers :) There’s 2 sets of files for you to download, the gifs are ready to roll, just upload them and insert the link into your html. But I’ve also included a set of Photoshop files, the texture’s just a mask so you can quickly & easily change the colour just by paint bucketing the layer. Note – there’s a second darker layer underneath, you’ll want to change this accordingly with your top layer. They’re all 150 x 150, so not too big file size, have a play around and I hope you find them useful.

Drawing with Illustrator Tutorial

By popular demand, this is as demo of how I draw with Illustrator ;) To be honest I’m completely un-aware of how other illustrators use it and I’ve never had any lessons or read an instruction manual, this is just what what works for me. I always start with a scanned in sketch, I only draw directly on a blank page if it’s something really simple or geometric. I’ll not get into drawing and sketching here, might write another post about that some other time. I generally lock the layer the sketch is on then draw over it on another layer with the pen tool. Hopefully by watching the video you should get the idea, below is a bit more in-depth info.

The pen tool:

illustrator's pen tool

This is what Illustrator is all about for me, the pen tool is pretty much the only thing I use. I know a lot of people that don’t use Illustrator because they can’t get the hang of the pen tool, I suppose it isn’t that intuitive, but it’s pretty simple once you get the hang of it. Click and stretch – everytime you put an anchor point down you can move your cursor while the mouse button is held down to affect the curve. If for example you’re drawing a ‘s’ shape and you want the curve to flow gracefully one way to the next, just keep adding anchor points and Illustrator automatically flows the curve (no idea what the proper technical terms are for this stuff!) If you want to make a hard corner you hold down the Apple key (cursor turns to little white arrow) and click the canvas (not on the line). Now if you click on the last anchor point you can carry on as before and send the line off at a sharp angle.

Tweaking the handles:
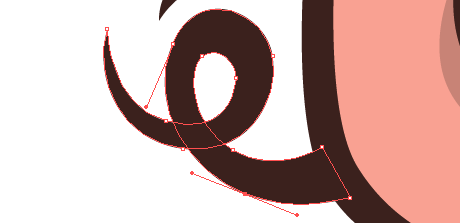
tweaking the handles in illustrator

white arrow toolThis is the key really, you try and draw it right with the pen tool, but you’ve always got to select the odd anchor with your little white arrow at some point and tweak them. Just click it, move it around, pull it’s handles in & out until your curves are looking just right. You can hold down the Apple key to get this tool while using the pen.

Colour palette:
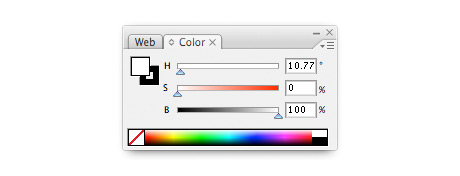
illustrator's colour palette

It’s down to personal preference I suppose, but I like to use the HSB colour palette over RGB or CMYK for making the colours I use. Mainly because I prefer my colours unsaturated – you can find the Hue you want with the top slider (H), then I generally take the saturation down a bit (S) slider and add a bit of black (B).

Pathfinder palette:

pathfinder palette

This is a really handy palette that I’m always using. Not sure what half the stuff does, but (1) joins shapes together – remember to click expand afterwards (from the menu bar: Object > Expand) And (2) divides over lapping shapes – remember to ungroup afterwards (from the menu bar: Object > Ungroup) Trust me, they are more useful than they sound!

Any questions just ask! I’ll try and update this post with feedback. Confused about of pork nose? Just playing around with the Poke’s logo, which my missis designed incidently.
Masks & Textures Tutorial

I‘ve been asked a few times what filter I use to produce the washed out, printed look of some of my work recently. Well it’s not a filter, I just drop some textures into the alpha channel in photoshop, it’s pretty straight forward so I’ve made a couple of quick tutorials showing how to do it for a painted and printed effect.

texture tutorial

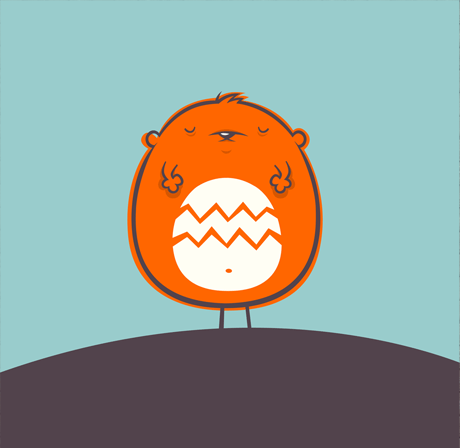
First up – making your illustration or graphics look painted onto a textured surface. I’m going use this little sleeping weeble above as demonstration, you can download the files to work with here.

texture tutorial

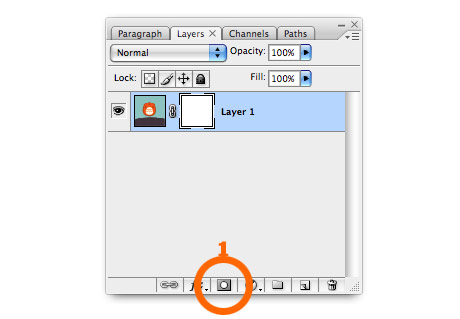
1. Create a layer mask. Open the image you want to look painted on. If you want you can download the image I’ve used here. Click the mask button on the bottom of the layer panel (1).

texture tutorial

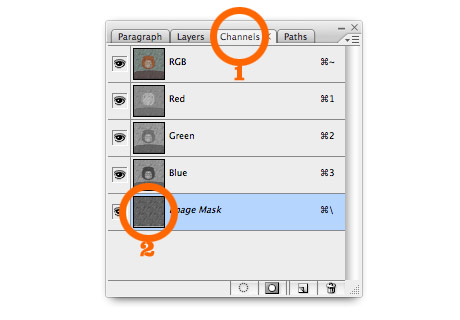
2. Stick something textured into the mask. I’ve used some wooden decking for this example, as it stands out quite well. If you’re using my photoshop file, select the wood pattern in the texture layer and copy it. Then re-select the image layer and click the channels tab (1). Select the bottom layer (alpha channel) and paste the texture (2).

texture tutorial

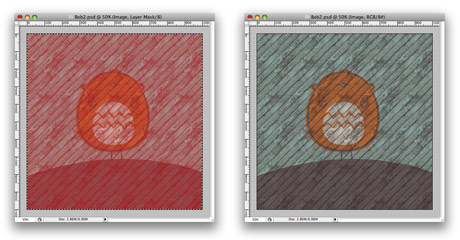
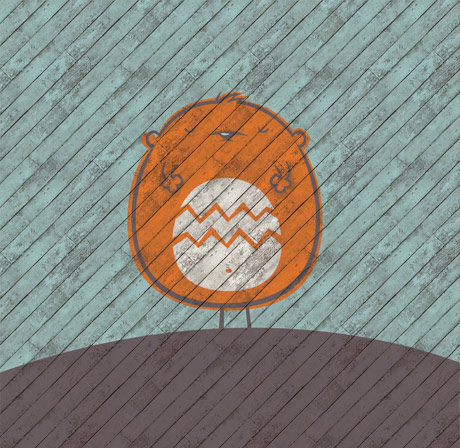
3. Finished! You should end up with something like the image on the left. You have to go back to your layers and select the image layer again to get rid of the red (not sure why…) Should now look like the image on the right.

texture tutorial

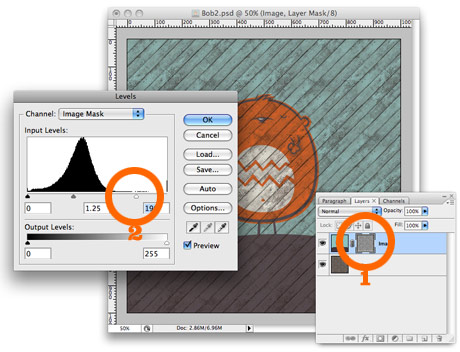
4. Fine tuning. At the moment the original image is quite transparent and a lot of the texture from the layer below is showing through. If you select the layer mask (1), then select from the menus – Image > Adjustments > Levels – you can move the white slider (2) over to the left and maybe the mid (grey) slider a little too. This’ll make the image less transparent (white = opaque in the world of masks)

The finished image:

texture tutorial

I’ve made the wooden fence/decking into repeating tiles, you can Download them here (Select the tile – Edit > Define Pattern – then you can use paint bucket to fill your page with the pattern).

Well that was my first ever tutorial, I hope it made sense!

Printed on paper tutorial

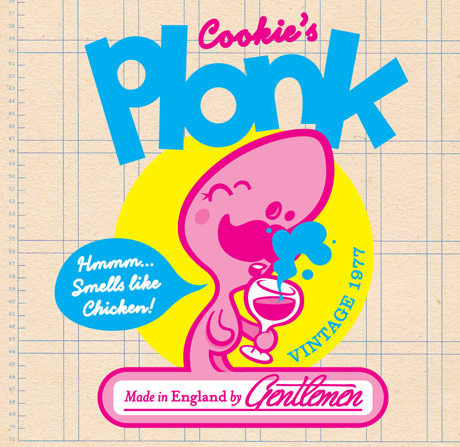
Here’s a quick tutorial showing how to make your illustration/graphics look like they’re printed. This is pretty much the same as the first tutorial, only we’ll be using different textures for the image than the background. For this example I’m re-creating my Cookie’s Plonk desktop wallpaper.

texture tutorial

This is our starting point, check here to download the Photoshop file I’ve used.

texture tutorial

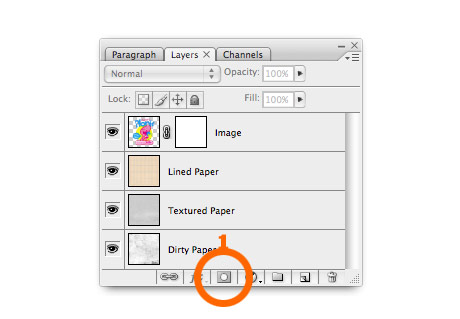
1. Create a layer mask. Open the image you want to look printed. If you want you can download the image I’ve used here. Click the mask button on the bottom of the layer panel (1).

texture tutorial

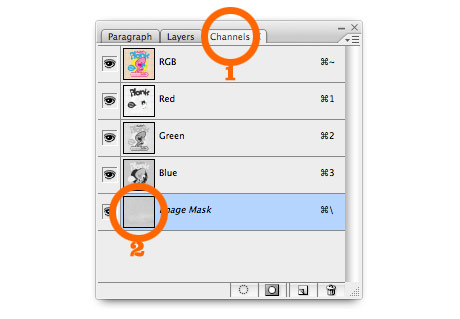
2. Add some paper texture. If you’re using my photoshop file, select the Textured Paper layer and copy it. Then re-select the image layer and click the channels tab (1). Select the bottom layer (alpha channel) and paste in the texture (2).

texture tutorial

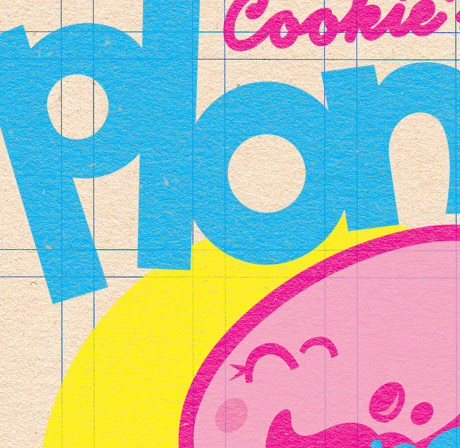
Return to the layers tab, and click the image layer. You can see above that the flat colour illustration now has the texture of the paper.
texture tutorial

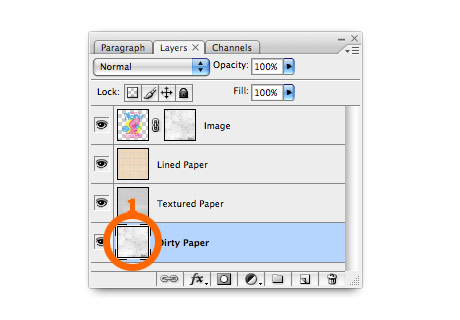
3. Add some wear & tear. To make it look a bit more realistic you might want to add some extra wear and tear. First you need to apply the first mask, select from the menu Layer > Layer Mask > Apply. Then repeat step 2 but use the dirty paper layer instead of textured paper this time.

The finished image:

texture tutorial

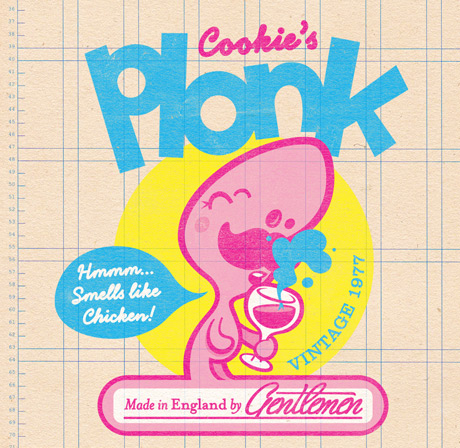
Here’s the finished image! If you quickly scroll up and quickly compare it to the starting point – it’s good at taking the edge off crisp vector graphics, making them look warmer, friendlier & more real I think.