I‘ve been asked a few times what filter I use to produce the washed out, printed look of some of my work recently. Well it’s not a filter, I just drop some textures into the alpha channel in photoshop, it’s pretty straight forward so I’ve made a couple of quick tutorials showing how to do it for a painted and printed effect.
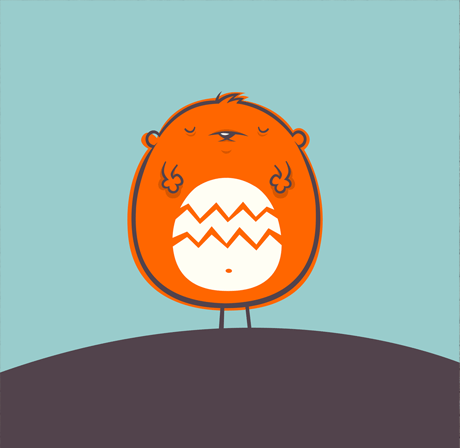
First up – making your illustration or graphics look painted onto a textured surface. I’m going use this little sleeping weeble above as demonstration, you can download the files to work with here.
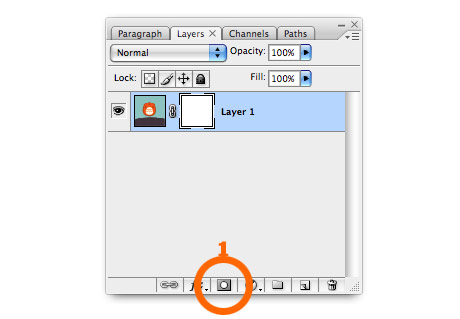
1. Create a layer mask. Open the image you want to look painted on. If you want you can download the image I’ve used here. Click the mask button on the bottom of the layer panel (1).
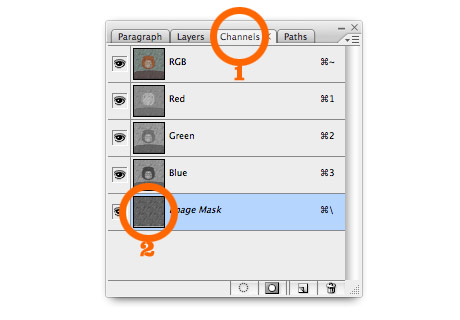
2. Stick something textured into the mask. I’ve used some wooden decking for this example, as it stands out quite well. If you’re using my photoshop file, select the wood pattern in the texture layer and copy it. Then re-select the image layer and click the channels tab (1). Select the bottom layer (alpha channel) and paste the texture (2).
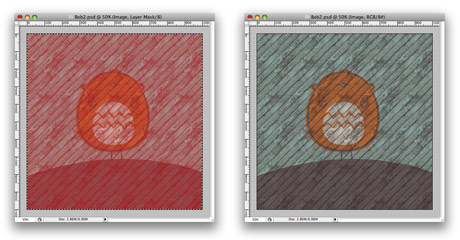
3. Finished! You should end up with something like the image on the left. You have to go back to your layers and select the image layer again to get rid of the red (not sure why…) Should now look like the image on the right.
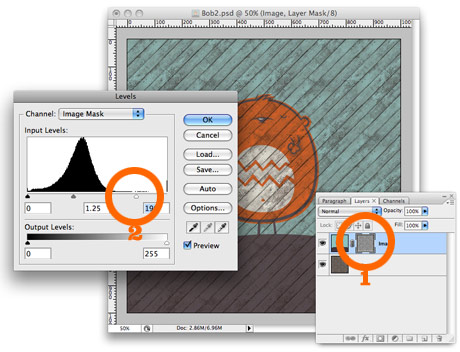
4. Fine tuning. At the moment the original image is quite transparent and a lot of the texture from the layer below is showing through. If you select the layer mask (1), then select from the menus – Image > Adjustments > Levels – you can move the white slider (2) over to the left and maybe the mid (grey) slider a little too. This’ll make the image less transparent (white = opaque in the world of masks)
The finished image:
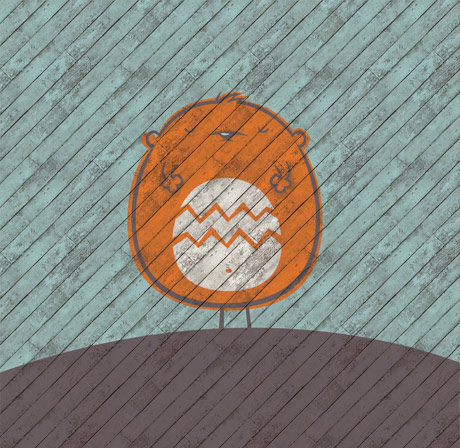
I’ve made the wooden fence/decking into repeating tiles, you can Download them here (Select the tile – Edit > Define Pattern – then you can use paint bucket to fill your page with the pattern).
Well that was my first ever tutorial, I hope it made sense!

Cookie..you are a genius!
I hated working in channels…now it’s finally clicked!
Keep up the great work!
Cookie
Another great tutorial! (I say another, cos I’m reading your posts in reverse order in an RSS Reader, so I’ve already seen the others)!
Keep these coming, I think lots of people will find them interesting.
Fantastic cookie – more more more. Especially your illustrator work. thanks for the tutorials.
Cheers Rich. Yeah I’m planning to do an Illustrator tutorial next, just sketching some characters now!
Great stuff! I love the pattern. You can also get some great effects by using these textures ontop of the artwork, and playing with the blend modes. Overlay and colour burn work well but you often have to mess with the colours and levels of the texture to get what you want.
Would be great to see some kind of speed up screen capture of you doing your characters in illustrator – if your stuck for tutorial ideas.
Hoping to see more!
Sweet bananas! Keep up the good work man. Love your blog!
Nice work! The reason it appeared red after you added the texture to the mask is because at that point you’re editing in quick mask mode. You can toggle it on and off by pressing the “\” key.
This toggle key is different than regular quick mask mode, when you’re not editing a mask, but the image in general. the toggle key for that is “q”. Hope that helps
top work Cookie!